The process of moving cross country is complicated enough as it is, without the pressure of having to safely transport heavy and delicate items such as chandeliers. With our guide on how to remove a chandelier, you’ll be able to safely relocate your beloved lighting fixtures. Our expert chandelier moving tips will ensure your new home is beautifully illuminated, making you feel comfortable in the new space.
Brighten up the new home with the old chandeliers How to Safely Remove a Chandelier
Safely taking down a chandelier involves meticulous preparation, from turning off the power and assessing the installation, to carefully disassembling and packing its components. Securing assistance, employing the right tools, and adopting precise loading techniques for transport are crucial. For intricate or valuable pieces, enlisting professional cross-country movers may be wise, ensuring a journey from ceiling to new setting is handled with care and expertise.
Preparing for the Chandelier Removal – Safety First
Before attempting to figure out how to take down a chandelier, prioritizing safety is paramount. This process involves several preparatory steps to ensure that the removal goes smoothly and without incident. The most critical of these steps is to make sure that all power is completely turned off.
It’s also essential to gather all necessary tools and equipment before starting, such as a sturdy ladder tall enough to reach the ceiling comfortably, wire cutters, screwdrivers, and safety gear like gloves and goggles. Having a clear relocation plan and all materials at hand can significantly reduce the risk of moving mistakes or damage to the lighting fixture.
Turning Off the Power Supply
The first and most crucial step in the removal process is to ensure that all power is turned off at the circuit breaker. This action goes beyond merely switching off the light from the wall switch – it involves cutting off the electrical supply from the source. Electrical safety is a paramount concern, and turning off the power at the circuit breaker completely eliminates the risk of electrical shock. After switching off the power, it’s a good practice to use a voltage tester to confirm that there is no current flowing to the light fixture.
Assessing the Chandelier’s Installation Once the Power Is Out
After turning off the power, assessing the ceiling mount is the next crucial step in a safe and efficient move. The method of installation varies with the chandelier’s size, design, and the ceiling’s structure, often involving mounting brackets, chains, or rods. Inspecting how the chandelier is attached helps determine the necessary tools (wrenches, screwdrivers, pliers) and any additional support required for its detachment.
Completely turning off the power supply is the first step Gathering Necessary Tools and Materials
Successfully removing chandeliers for moving not only requires careful planning and a focus on safety but also the right set of tools and materials. Preparing these items in advance will ensure that the removal process goes smoothly and that the chandeliers are protected throughout the long-distance move.
Get the Right Tools for the Job
The basic tools required for this delicate process are relatively simple and can be found in most households or easily acquired. Here’s a list of essential items you will need:
- Screwdrivers – A set of both flathead and Phillips head screwdrivers to remove any screws securing the lamp to the ceiling.
- Pliers – Needle-nose pliers are particularly useful for bending wires or gripping small parts, while standard pliers can assist with loosening nuts or bolts.
- Wire cutters – For cutting through electrical wires.
- Adjustable wrench – To loosen any bolts or nuts that may be holding the installment in place.
- Voltage tester – To double-check that the electricity is indeed off before starting the removal process.
- Ladder – A sturdy ladder that is tall enough to allow you to comfortably reach the chandeliers without stretching.
- Protective gear – Safety goggles and gloves to protect your eyes and hands during the removal process.
Proper Packing Materials Are Essential for Protection
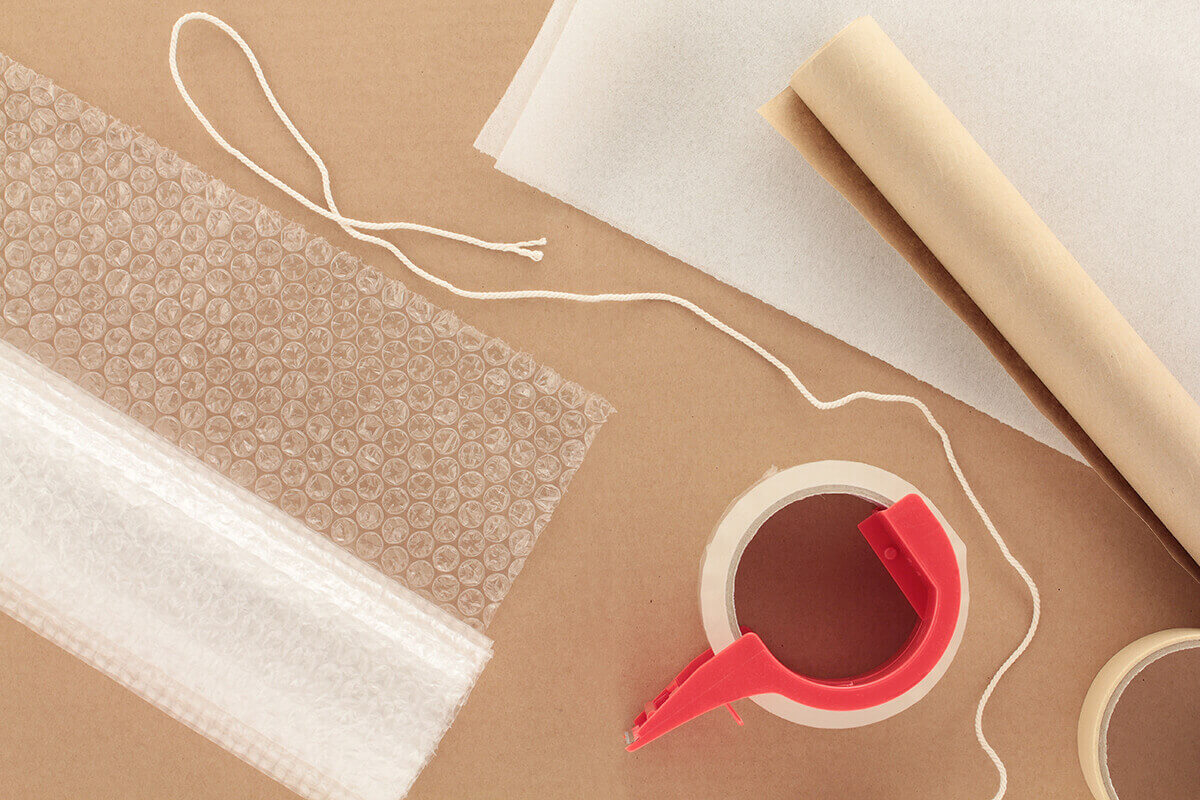
When it comes to securing chandeliers for moving, the selection and use of appropriate packing materials cannot be overstated. Wrapping the chandeliers or their detachable parts in bubble wrap offers a first line of defense, cushioning against the bumps and jolts of transit. For the finer, more delicate elements, soft packing paper serves as an ideal protective layer, preventing scratches and other damage.
The choice of a sturdy box is crucial – it must be large enough to comfortably fit the wrapped chandelier yet snug enough to prevent excessive movement. Inside this box, packing peanuts or foam can fill the voids, ensuring that the object remains immobile and is buffered on all sides. Sealing the relocation boxes with high-quality packing tape fortifies them against opening during handling, and clearly marking the box with the contents and handling instructions alerts long-distance movers to the need for gentle care.
Proper packing supplies and tools can ensure safe transport of your chandeliers Ultimate Step-by-Step Guide to Chandelier Removal
The process of removing chandeliers can be intricate and requires a careful, methodical approach. Each step, from securing assistance to the final lowering of the chandelier, plays a critical role in ensuring the safety of both the individuals involved and the lighting fixture itself.
Secure Support and Assistance – It’s Not a One Person Job
Before embarking on the actual removal part of the process, it is essential to prepare for its safe descent. The first step is to ensure that the chandelier is supported adequately to prevent it from falling once detached. Depending on the size and weight of the lighting fixture, this could mean preparing a stable platform or securing the fixture with durable ropes or straps that can bear its weight.
Equally important is having an assistant to help hold the chandelier during the removal process.
An extra set of hands is invaluable for safely managing the item’s weight, particularly at the critical moment when it is detached from the ceiling mount.
The assistant can also help by handing over tools, managing the ladder, and ensuring that the work area remains safe throughout the process.
The Givenchy Royal Hanover German is the most expensive chandelier ever sold - for a small price of 9 million dollars
Detaching and Lowering the Chandeliers
Detaching and lowering chandeliers is a delicate task that requires precision and caution. First, ensure the power is completely turned off at the circuit breaker for safety. Carefully remove any easily detachable parts to lighten its load. Using a sturdy ladder and having an assistant is crucial for this step – one person should stabilize the lamp while the other disconnects the electrical wiring and unscrews the mounting hardware.
Once detached, both individuals should carefully lower the chandelier, maintaining communication and balance to prevent any sudden drops or swings. This process, when done thoughtfully, ensures the chandelier is removed safely, ready for efficient packing and relocation.
Removing chandeliers is at least a two-person job Disassembling and Packing a Chandelier
When moving a lamp of this magnitude, you may find that disassembling it is necessary to both protect its delicate components and ensure it fits into available packaging materials. This process requires meticulous attention to detail to prevent things from breaking and simplify reassembly later.
Careful Disassembly Is a Step You Cannot Skip
The first step in disassembling your chandeliers is to lay out a clean, soft cloth or blanket where you can place the parts, protecting them from scratches. Begin by removing easily detachable elements, such as crystals, bulbs, and lampshades. As you disassemble these parts, it’s vital to keep track of where each piece belongs. Organizing and labeling the parts can be incredibly helpful for this – small zip-lock bags or containers labeled with a marker can hold screws, bolts, and other small hardware.
Wrapping and Packing Techniques
Once the chandelier is disassembled, the next step is to wrap the breakables and pack each component carefully to prevent damage during transit. Start with the individual pieces you removed first, wrapping them in soft packing paper or bubble wrap. Secure the wrapping with tape, but make sure it does not come into direct contact with the item to avoid leaving a sticky tape residue.
For the frame and larger parts, bubble wrap is especially useful for providing cushioning. Ensure that every crevice and protrusion is adequately protected to prevent bending or snapping. When wrapping components, double wrap for extra protection, especially for parts that are particularly fragile or have sharp edges.
Once all pieces are wrapped, begin placing them in the sturdy box you’ve prepared, layering the heaviest items at the bottom. Use crumpled packing paper or additional bubble wrap to fill any gaps in the box, preventing movement that could lead to damage. When all components are packed, seal the box with strong packing tape, then clearly label the box as “Fragile” and indicate which side should face up.
Don't forget to properly label the box Transporting the Chandelier – Final Step
Transporting a chandelier requires careful handling and preparation to ensure its safe arrival at the new destination. Given its fragility and often intricate design, it can be one of the more challenging items to move. However, with the right approach, you can mitigate risks and protect your valuable lighting fixture throughout the journey.
Secure Loading for Moving
When loading such a heavy, delicate item into a moving truck, it’s essential to ensure that it is well-protected and securely placed to prevent any movement that could lead to damage. After carefully packing it, find a stable and flat surface in the vehicle for its placement.
Ideally, the box should be surrounded by soft items, like blankets or cushions, to provide additional shock absorption. It’s also wise to avoid stacking anything on top of the chandelier’s box, regardless of how well it’s packed, to prevent any undue pressure. Ensure the box is securely fastened within the vehicle using straps or bungee cords to keep it from sliding or tipping over during transport.
Consider Hiring Experienced Professional Movers
For high-value or particularly complex chandeliers, considering professional movers and their professional packing services for chandeliers might be a prudent decision. These experts have the experience, materials, and equipment necessary to handle delicate items with the care they require. Hiring a long-distance moving company is particularly advisable if the chandelier is an antique item, oversized, or made from materials that are difficult to protect with standard packing methods.
Additionally, if you’re moving a long distance or have several valuable items to transport, professional cross-country moving services can provide peace of mind, ensuring that your possessions are in safe hands. Reliable cross-country moving companies often offer moving insurance options as well, adding an extra layer of security for your valuable chandeliers during the move.
In situations where the risk to the chandelier is significant, the expertise and services offered by professional moving companies such as Cross Country Moving Company can be invaluable. Just make sure to check if your chosen company is legitimate before hiring them – you can do so on sites like the Better Business Bureau.
Professional movers have expertise in handling delicate items like chandeliers Lighting the Way – A Graceful Journey for Your Cherished Chandelier
The process of moving valuable light fixtures is an intricate task that demands careful planning, precision, and an understanding of its unique requirements. Whether you decide to undertake this task with the help of friends or opt for the expertise of professional movers, the key to a successful move lies in attention to detail and prioritizing the chandelier’s safety.
However, if you want a smooth and stress-free move, make sure to contact us at Cross Country Moving Company and allow our long-distance moving services to take care of everything.
Frequently Asked Questions
How Do I Know if I Should Remove the Chandelier Myself or Hire a Professional?
Decide based on the item’s complexity, weight, and your comfort with electrical fixtures. If it’s simple and lightweight, DIY chandelier removal with proper tools and help might suffice. For large, intricate, or valuable chandeliers, professional services are recommended for safe removal and transport.
What Is the Safest Way to Pack Glass or Crystal Chandeliers?
The safest packing method involves disassembling the chandeliers as much as possible, wrapping individual components in bubble wrap, and using packing paper to prevent scratches. Ensure all parts are snugly fit in a sturdy box with ample padding to avoid movement.
Can I Reassemble the Chandelier Myself After Moving, or Should I Seek Professional Help?
If you have a good understanding of the chandelier’s assembly, detailed photos or diagrams from before disassembly, and are comfortable with electrical installations, you can reassemble it yourself. For complex or high-value chandeliers, professional installation is advisable to ensure safety and functionality.
What Should I Do if Parts of the Chandelier Are Damaged During the Move?
First, assess the extent of the damage. Minor damages might be repairable with replacement parts or a little DIY. For significant damage, especially to valuable or antique chandeliers, consulting a professional restorer or the manufacturer for repair or replacement parts is best.
How Do I Prepare a Chandelier for Long-Distance Transportation?
Thoroughly pack it using the guidelines for safe packing of glass or crystal components. Secure the box in the moving vehicle to prevent shifting, and use climate control if applicable. For very long distances or valuable pieces, using a professional moving service that offers insurance and specializes in packing fragile items might be the safest option.
